Rolling Rooks
¬Ý

¬Ý
¬Ý

¬Ý
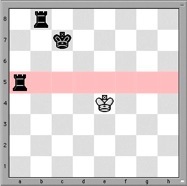
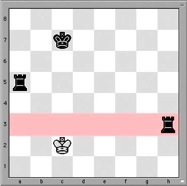
Here's a step-by-step of the basic Rolling Rooks pattern.
Black to mate.
1 ... Ra5
The Rook on a5 draws a line controls the 5th rank.
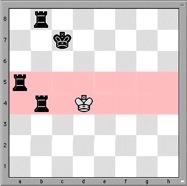
2 Kd4, Rb4
Push the White King down!
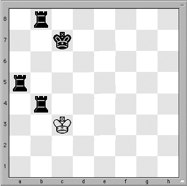
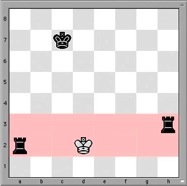
3 Kc3 ...
White threatens the Rook on b4, so where to go? Just roll that Rook to the other side of the board!
3 ... Rh4
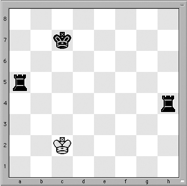
4 Kc2 ...
White steps to the side of the board without being forced.
What should Black do here? Or rather, what should Black not do?
4 ... Rh3
Either Rook will do as long as you just draw a new holding line.
5 Kd2 ...
The White King makes it easy. What should Black do?
5 ... Ra2
Push the White King down!
6 Kd1 ...
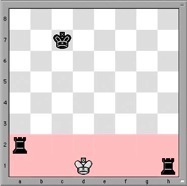
6 ... Rh1 mate
No stalemate today!
¬Ý
Nutshells & Links
The Rook's power to rule along the ranks and files means it can do something the minor pieces cannot: a Rook can draw a line on the board that the opposing King cannot cross.

Connected Rooks usually means a player has developed their pieces.
¬Ý
¬Ý


